Pyramid Box Projects

I just got my new shipment of custom dies from AccuCut, and made these really cute boxes from the pyramid box die set. Basically, it’s a resizing of AccuCut’s Box Pyramid #3 BX925. I wanted a box that was as large as possible, but not too large for 12×12 paper. The base is 4-7/8″ square when folded, the top opening is 3-3/8″ square, and the box stands about 3-3/8″ high. I made three different samples:

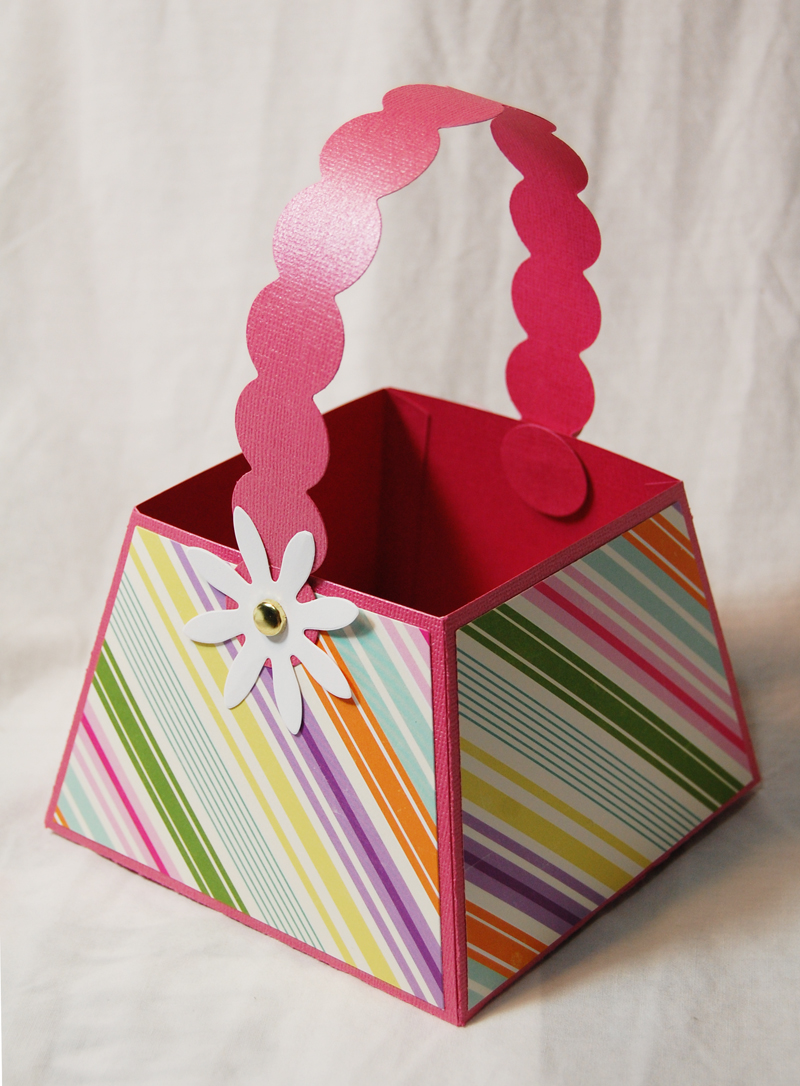
Here is a spring or Easter box. Cardstock is Bazzill Bling Feather Boa and the striped patterned paper is Hippity Stripe from Echo Park Paper Co.’s Hippity Hoppity line. The daisy on the side is also new from my custom layering daisies dies, sizes 1.5″ up to 5″, in 1/2″ increments. The handle was also cut from a new custom die shape, a resizing of AccuCut’s Borders #2 die BR571, the scalloped shape. Their shape is 3/4″ wide, and mine is 1″ wide. I attached the handle with a 1/4″ circle gold brad and then covered the brad tails on the inside of the box with 1″ circle cut with a circle punch.


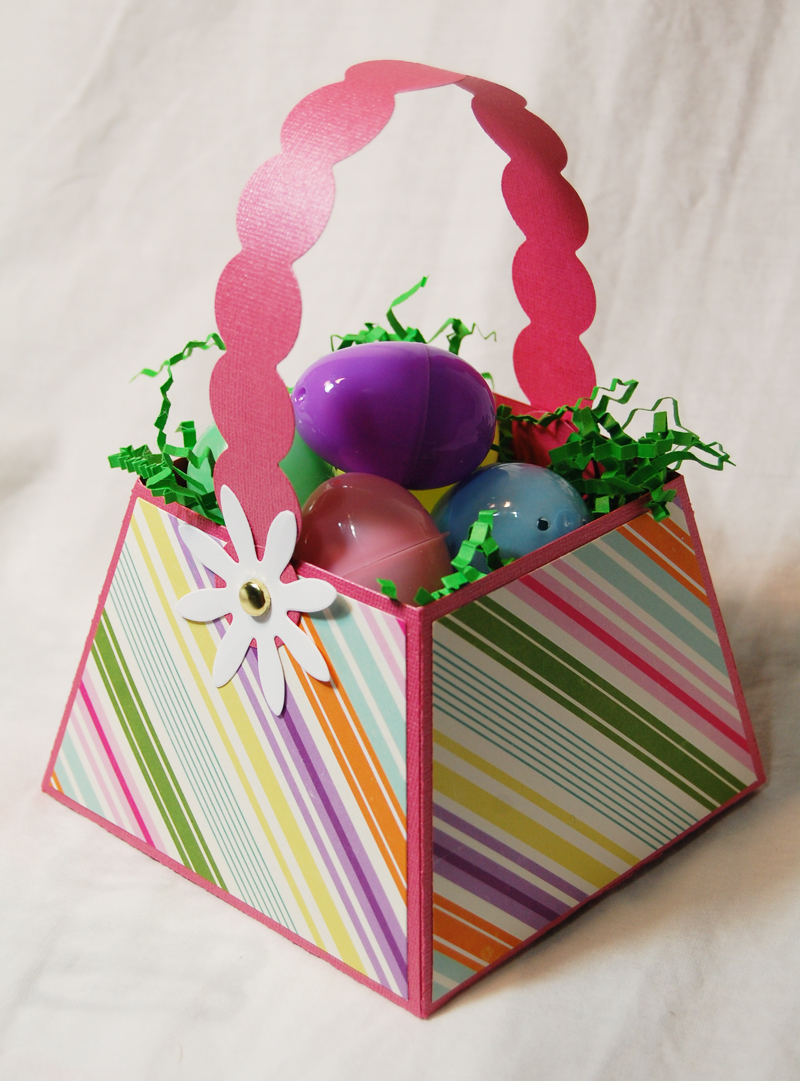
Here is the box filled with Easter grass and mini plastic eggs.


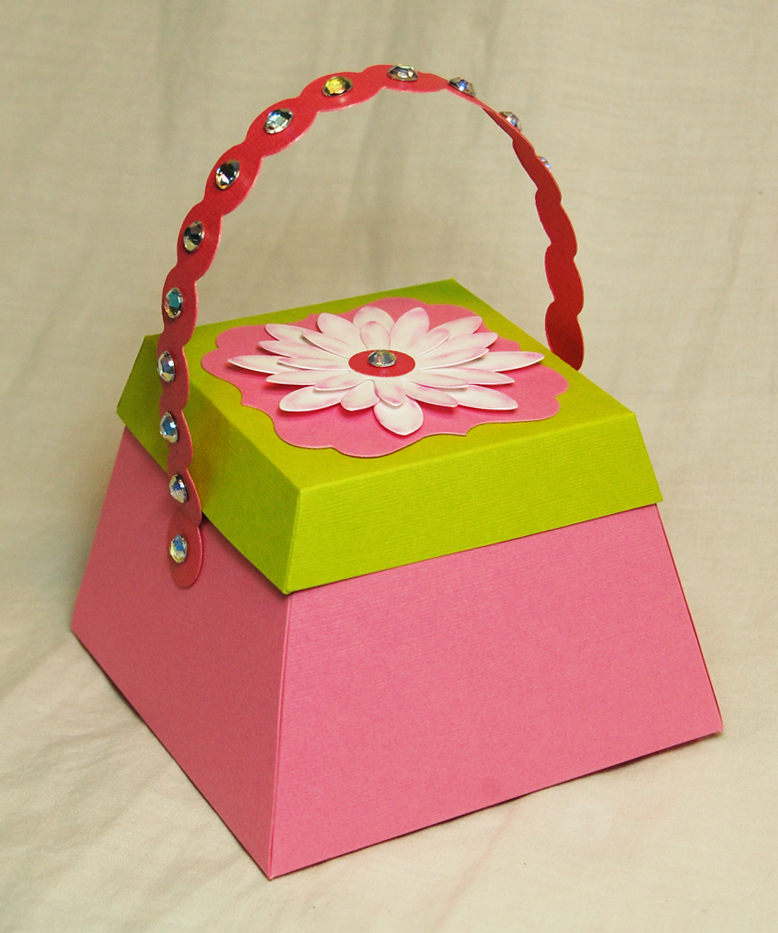
Here is the pyramid box, purse style. I used the AccuCut Borders #2 die BR571, 3/4″ wide, for the handle and blinged it up with Hero Arts 7mm Gems. Cardstock was Bazzill Basics Bling Feather Boa for the handle, Granny Smith for box top, and Chablis for the box bottom. Also used was AccuCut die CV210 Convertibles frame for the top mat and I used my new layering daisies dies to make the flower on the top, inking the edges with an old Stampin’ Up! Pink Passion ink pad.


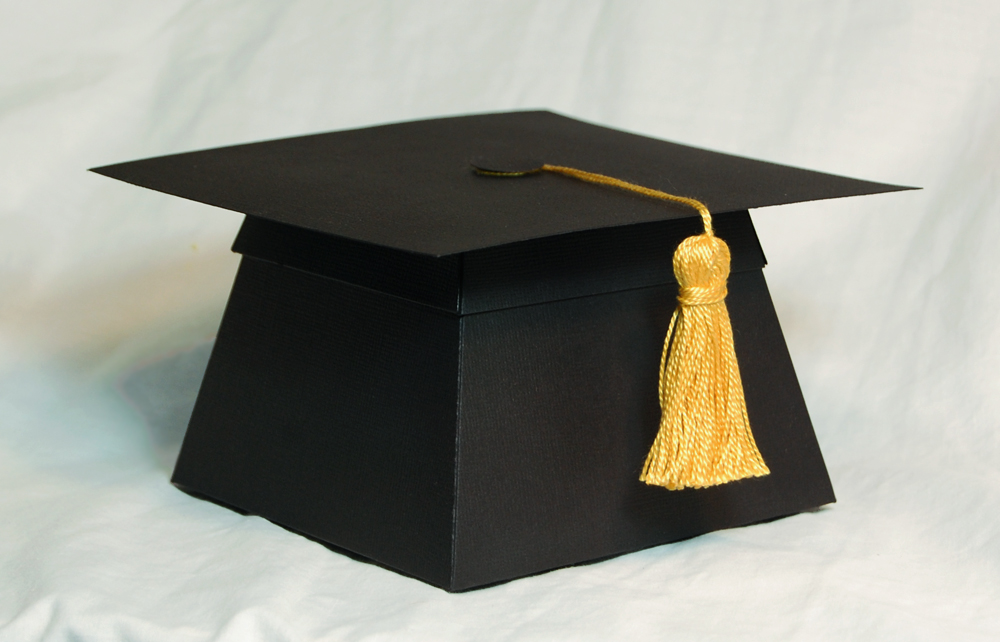
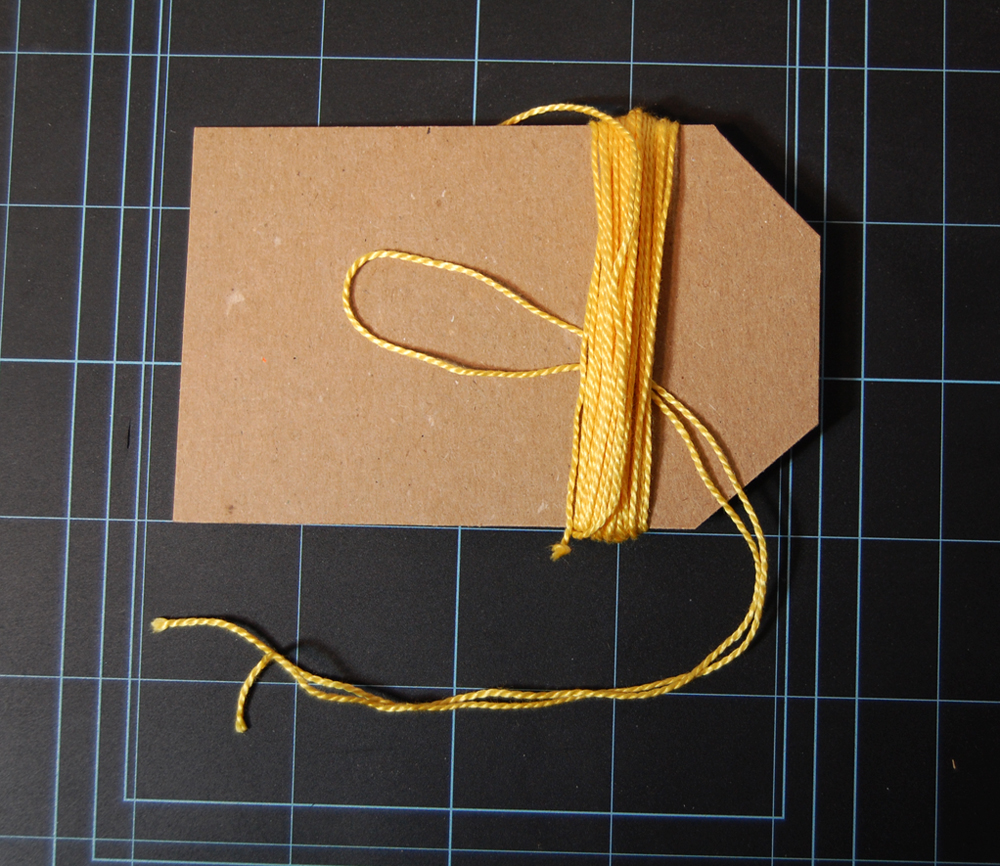
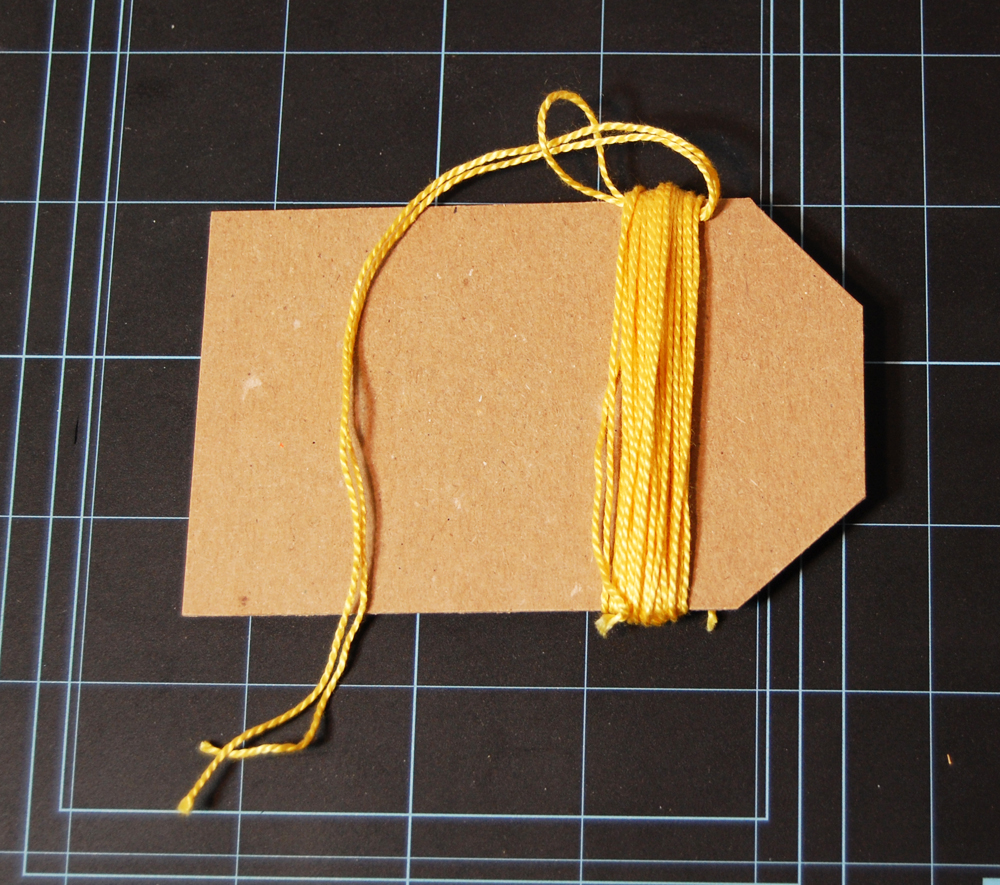
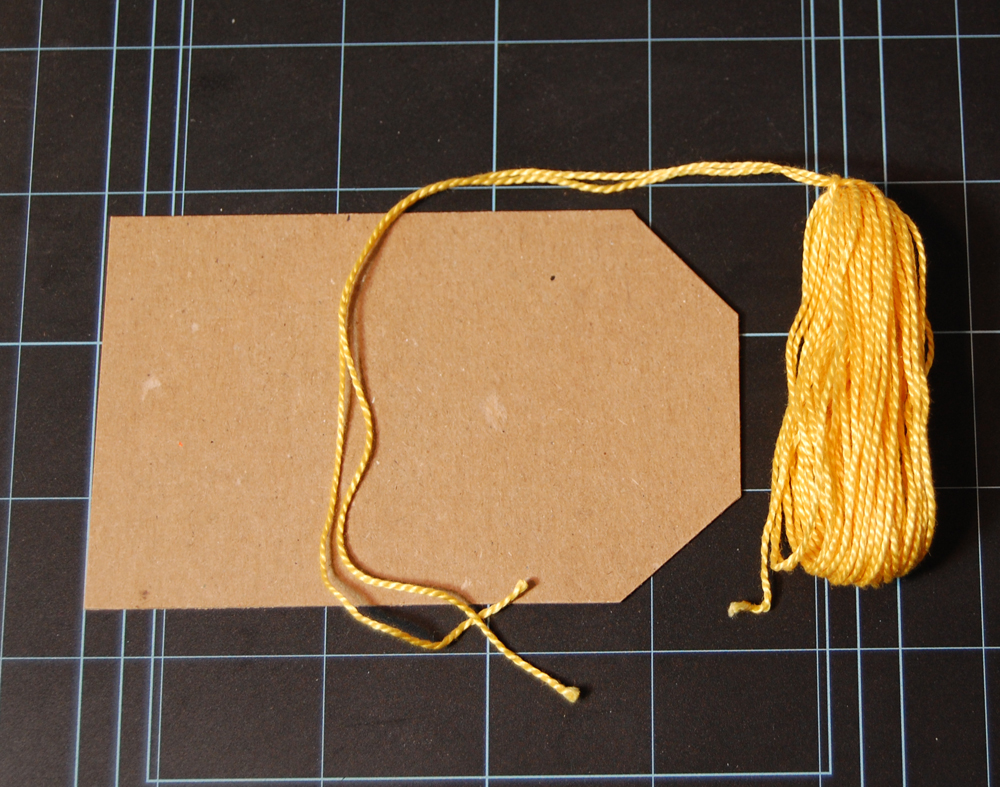
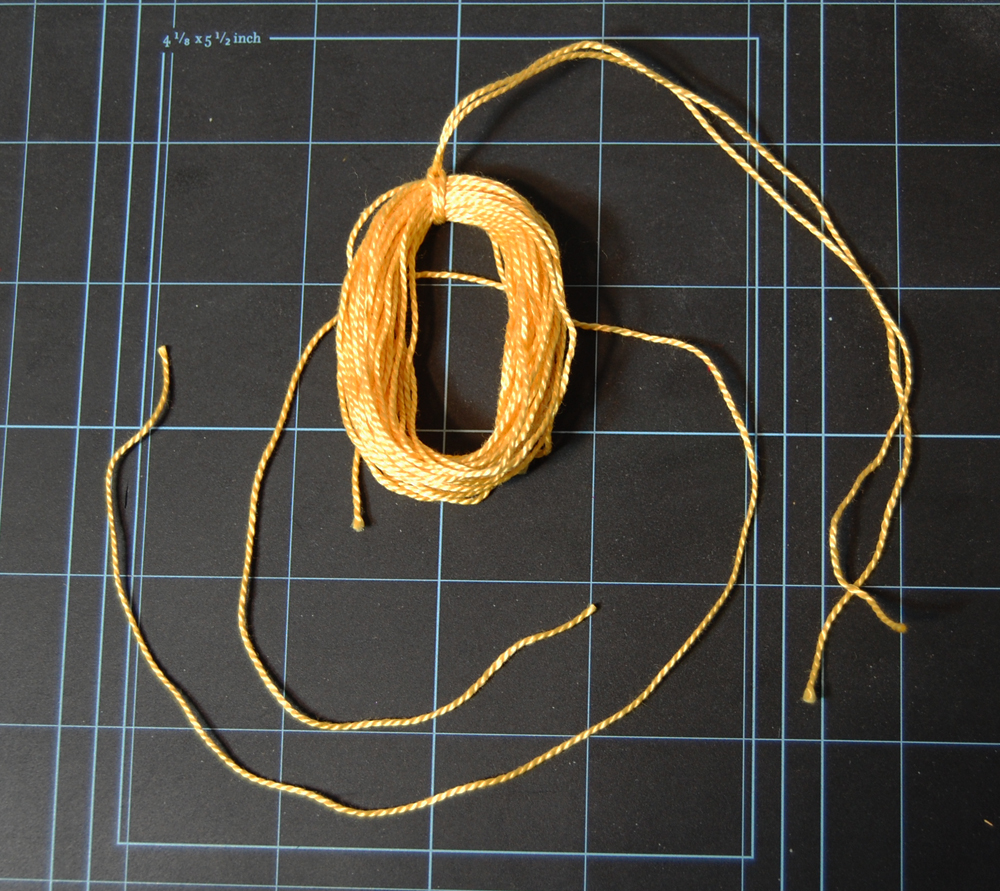
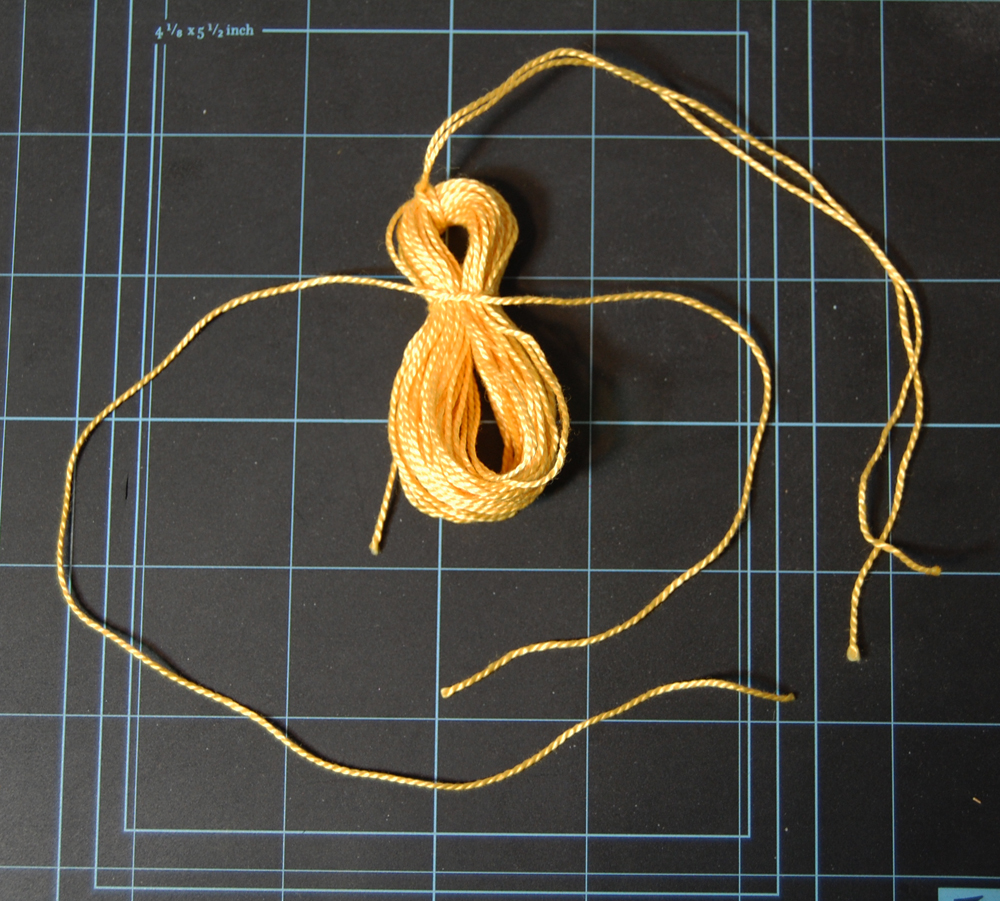
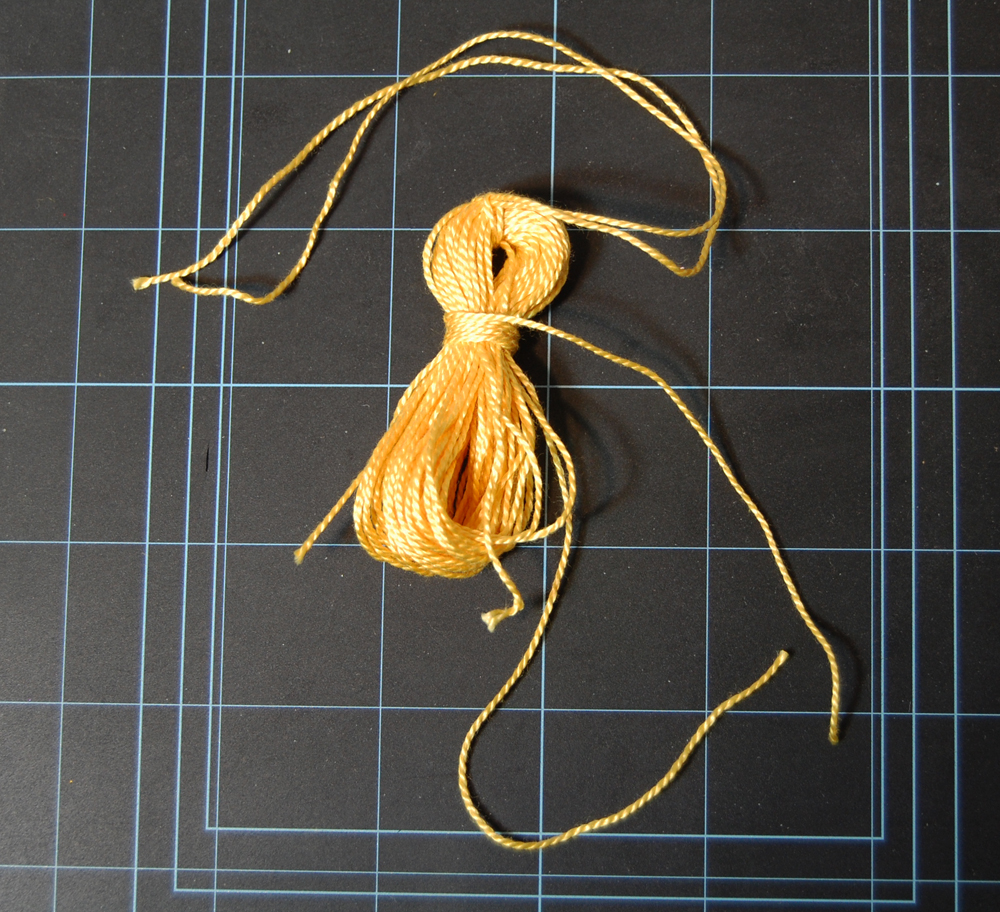
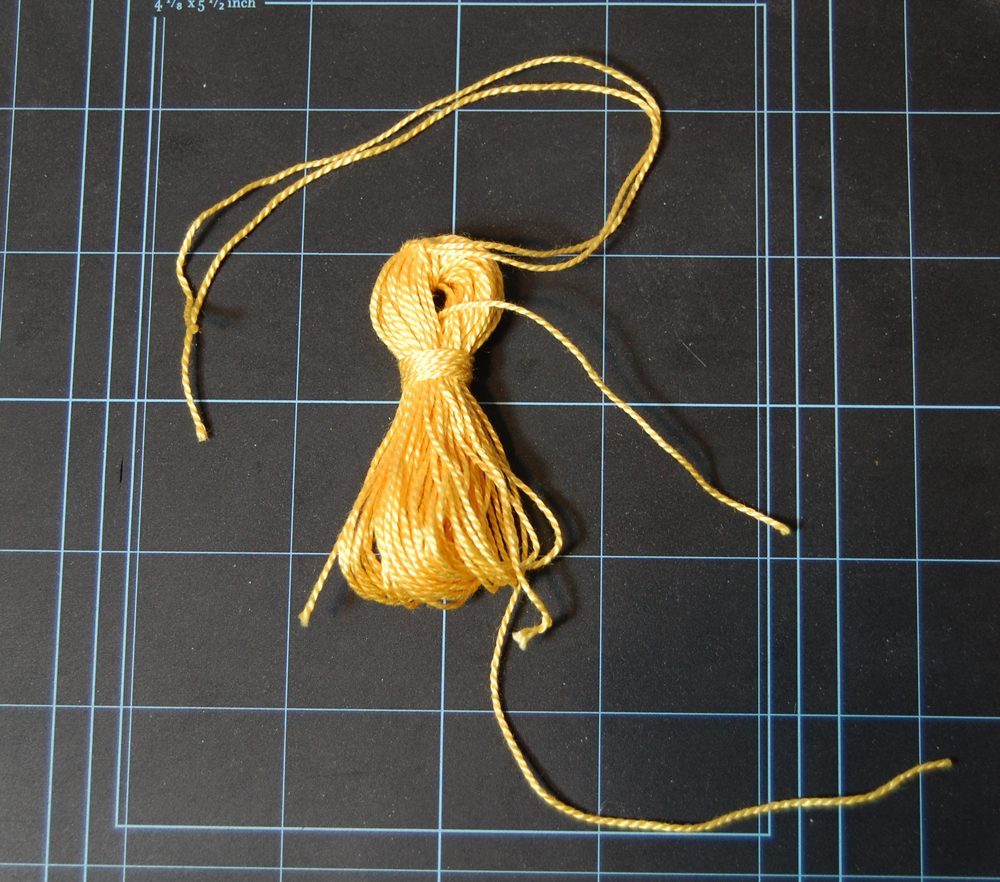
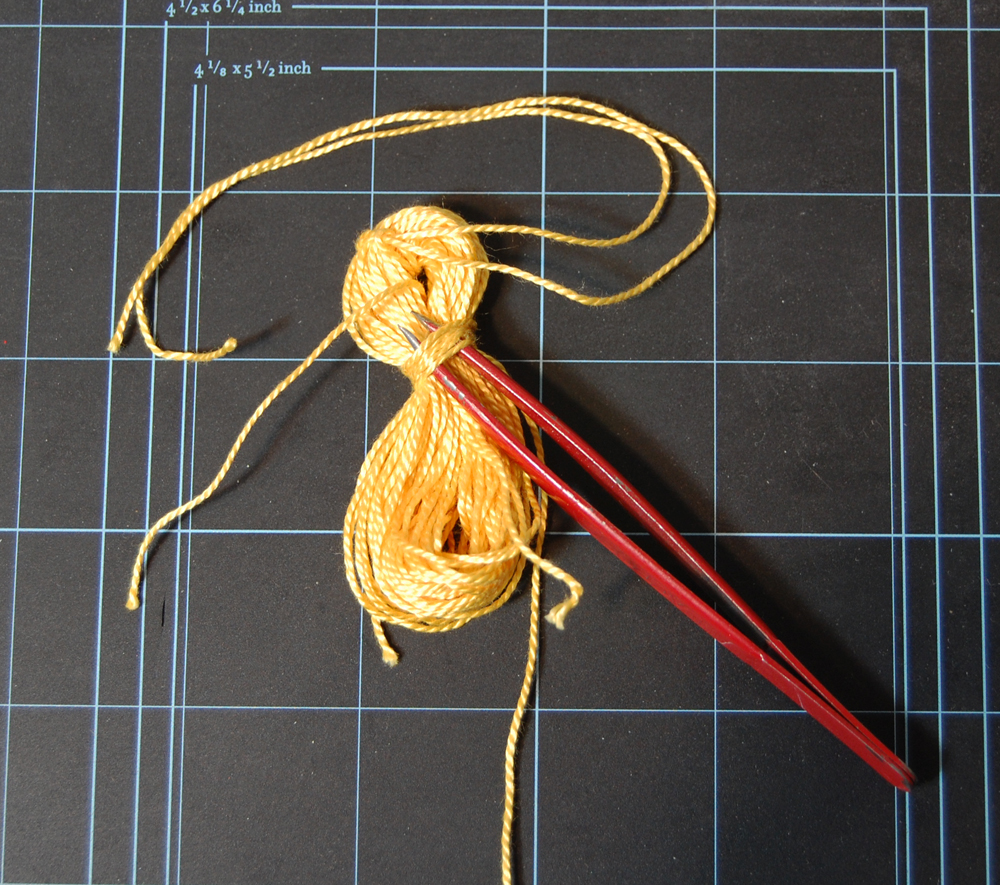
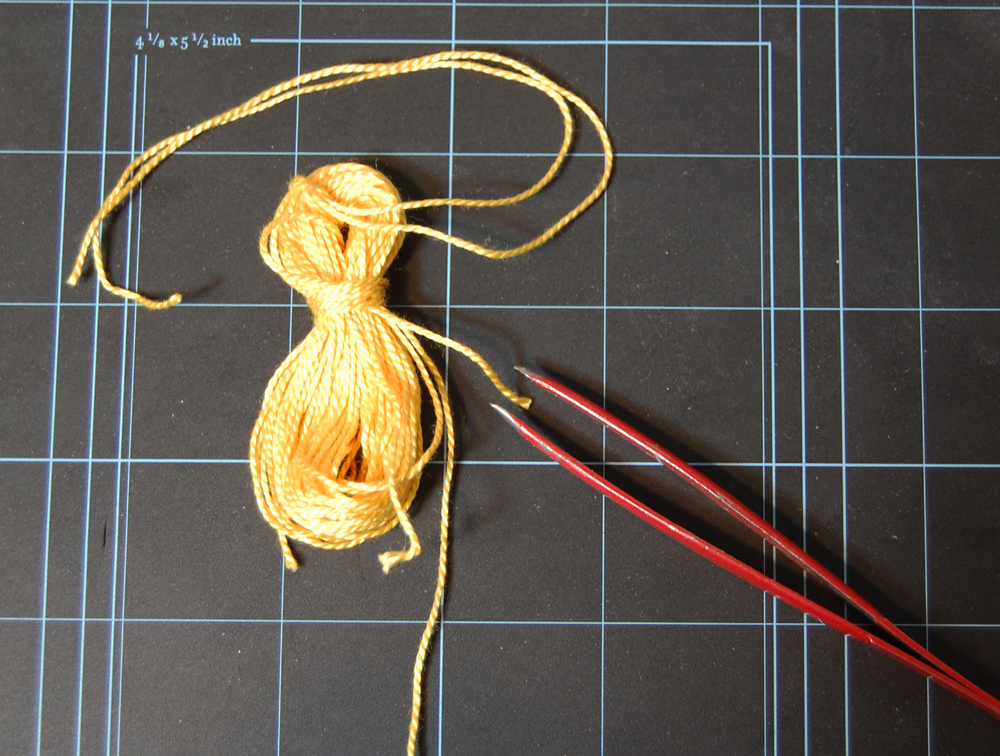
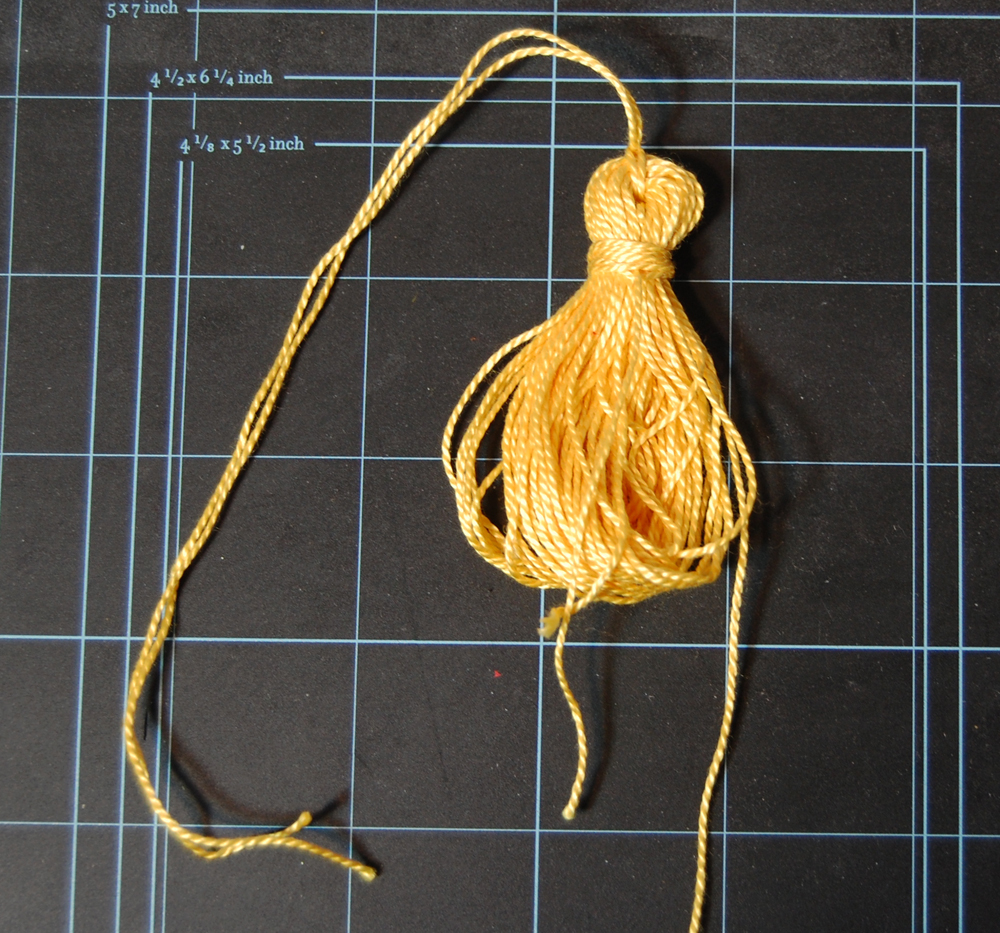
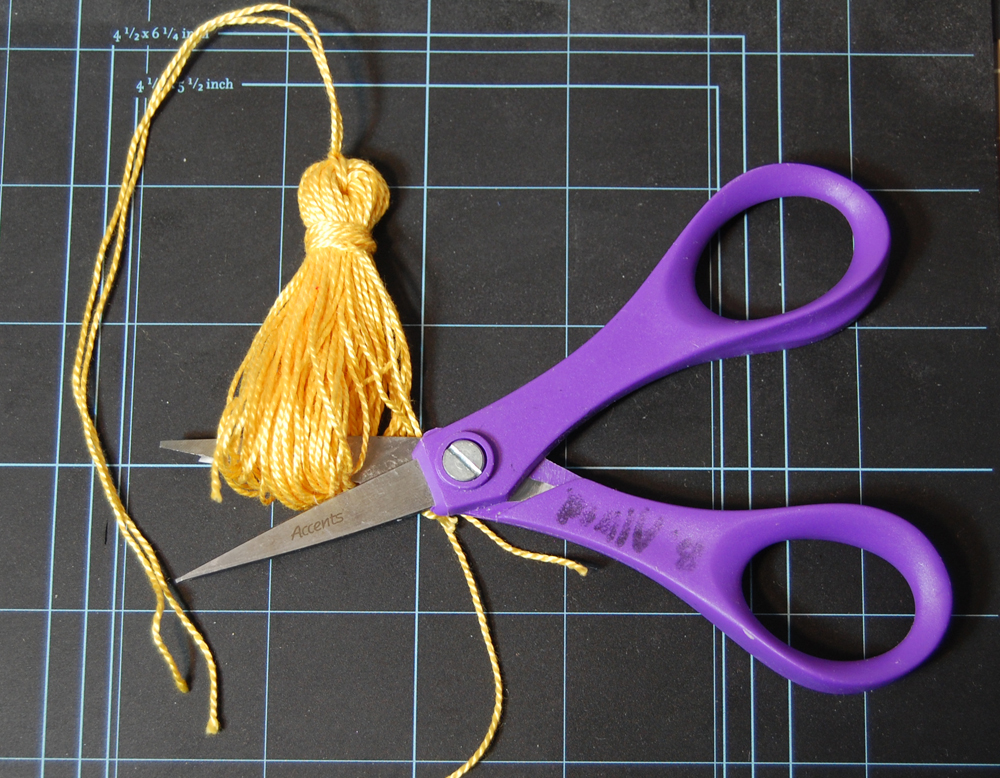
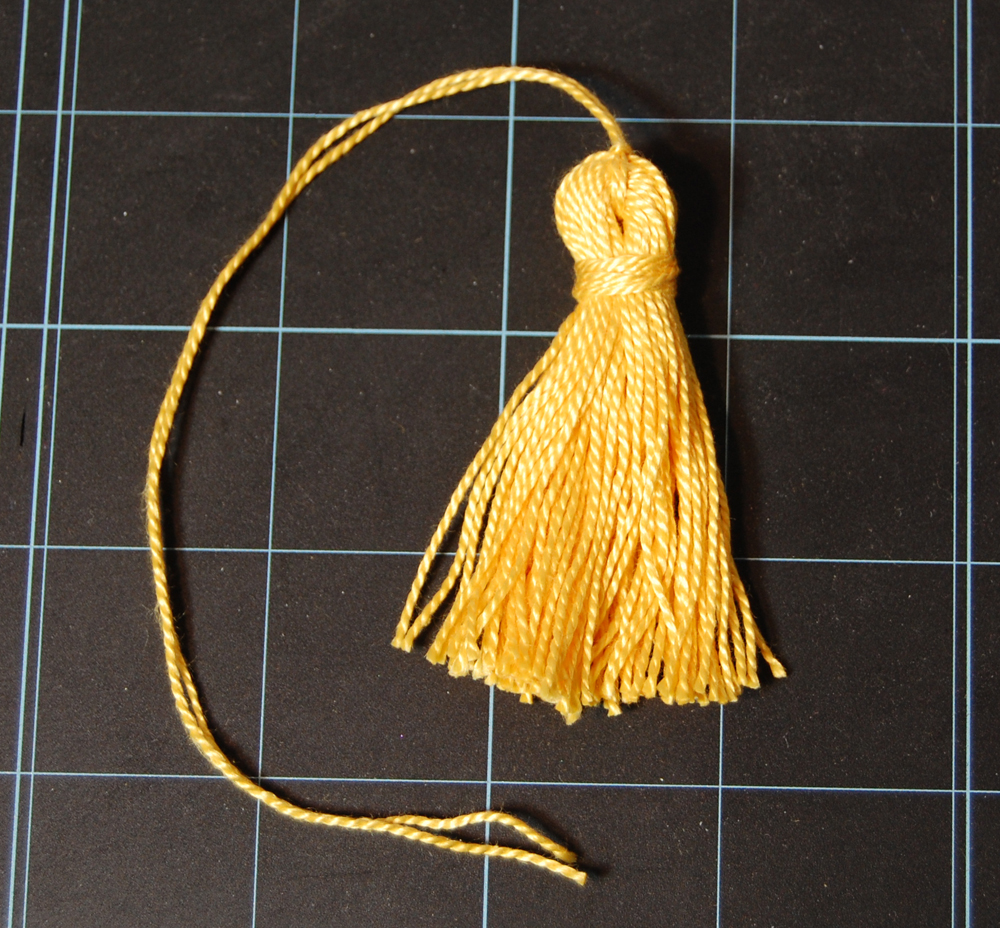
Here is the graduation favor box. I cut a box bottom and box top from Bazzill Basics Raven, then added a 6″ square for the top. The circle is cut from a 3/4″ circle punch. And I handmade the mini tassel. You can see the instructions on my How to Make Tassels post.

A view of the inside of the box. Fill it with goodies for the lucky graduate!

How to Make Tassels

Here’s a brief overview of how to make tassels, then we’ll look at it in detailed steps:

Okay, let’s take it step by step:

First, take your string or yarn and wrap it around a flat object or card. Here, I’m using DMC Floss, size 5, Topaz 725, 25m or 27.3yards, and I’m wrapping it around a piece of chipboard that is 2.5″ tall. I chose to make a fatter tassel, so I wrapped it 50 times around. 40 wrappings is more typical, but you can adjust it according to how fat you want it. Also, be sure to not wrap too tightly or you will have a hard time getting your tassel off the card. Plus, you have to be able to get a loop underneath all those wraps.


Next, take a piece of string and make a loop. I used a 12″ piece of string. Slide the loop under the wraps.


Now put the tail of your string through the loop.


Pull the tail tight


Now slide your wrapped tassel off the card.


Next take a long piece of string (I used 16″), and place it under the tassel, one side longer than the other for wrapping around the tassel.


Tie the two ends of the string around the tassel once, but don’t knot it.


Take the long end of the string and wrap it about six times around the tassel. The end of the string is lying on top of the tassel.


Now bring the end/tail of the string around to the back and then through the middle of the eye, or hole, of the tassel.


Take a pair of needle-nose tweezers, a small crochet hook, or make a tiny hook with a paper clip, and slip it under the wrapped string. Hook that tail you just brought through the eye/hole.


Now pull that tail down and through the wrapping.


Pull the tail tight, then push the wrapping up towards the top of the tassel, adjusting any loose strings as needed.


Now cut all the loops at the bottom.


Trim the ends as needed. My tassel is now about 2-1/8″ to 2-1/4″ long and ready to be attached to my project. You can knot the top two strings or leave the ends loose, depending on how you are going to use the tassel. What length of string was needed to make this tassel? I guesstimate it was 290″, or about 8 yards. I purchased this skein of string for $1.69 at JoAnn’s Fabrics, and I should be able to get 3 of these mini tassels out of that. That makes each tassel about $0.56 each, plus tax. I think once you get the hang of it, you will probably be able to make a tassel in under 10 min. Here is a sample of how I used mine to decorate a graduation favor box:


I tucked the ends under the top circle (which has a Glue Dots Pop Dot underneath, very sticky) and trimmed off the extra string.

Criss-Cross Leaf Card

Yep, took my new AccuCut NC228 A2 Criss-Cross Card die set to Mary’s on Saturday, and we cut a bunch of cards with her big paper stash. I added the cream strip to the card band and some leaves I cut with my Pazzles (Maple Leaf 2 from CD03 collection) then embossed with a stylus and my stamping mat. I don’t know what brand the paper is, but the greeting comes from the Hero Arts CL434 Just Find Me stamp set.

WordPress theme: Kippis 1.15